

If you want to publish your app on Google Play, you’ll need to create a Google Play Developer account. This account gives you access to the Google Play Console, the main gateway to publishing and managing your apps on the Play Store.
Whether you’re an app developer or publisher, having a developer account is essential to make your app available to users, gain downloads, and eventually earn revenue.
Creating a Google Play Developer account involves a few registration steps, which can sometimes be confusing and challenging along with following Google’s policies to ensure your app is accepted on the store.
What You Need to Ensure Your App Being Approved By Google
We’ve published a dedicated article outlining the key conditions, tips, and best practices to get your app approved on both Google Play Store and Apple App Store. In summary, your app must meet the following requirements to be accepted:
- Make sure your app is free of bugs and errors, and follows proper UI/UX guidelines for the best user experience. It must serve a clear purpose and provide real value to users, otherwise, it will be simply rejected.
- Include Terms of Use and a Privacy Policy. If your app collects user data or includes in-app payments, you must provide a clear privacy policy page. Google will require you to specify this policy before publishing.
- If your app is based on WebView, it must still look and behave like a native app. Include elements like bottom or side navigation menus.
( the Felucca platform can help you convert and enhance your WebView apps to make them feel more native.)
Step-by-Step Guide to Create a Google Play Developer Account
To create a Google Play Console account, follow these steps carefully:
1. Create or use a Gmail account
Duh!
Before anything else, you need an active Gmail account. Then go to the Google Play Console this is where developers and publishers manage their apps. Sign in with your Gmail account and click Get Started to begin the registration process.
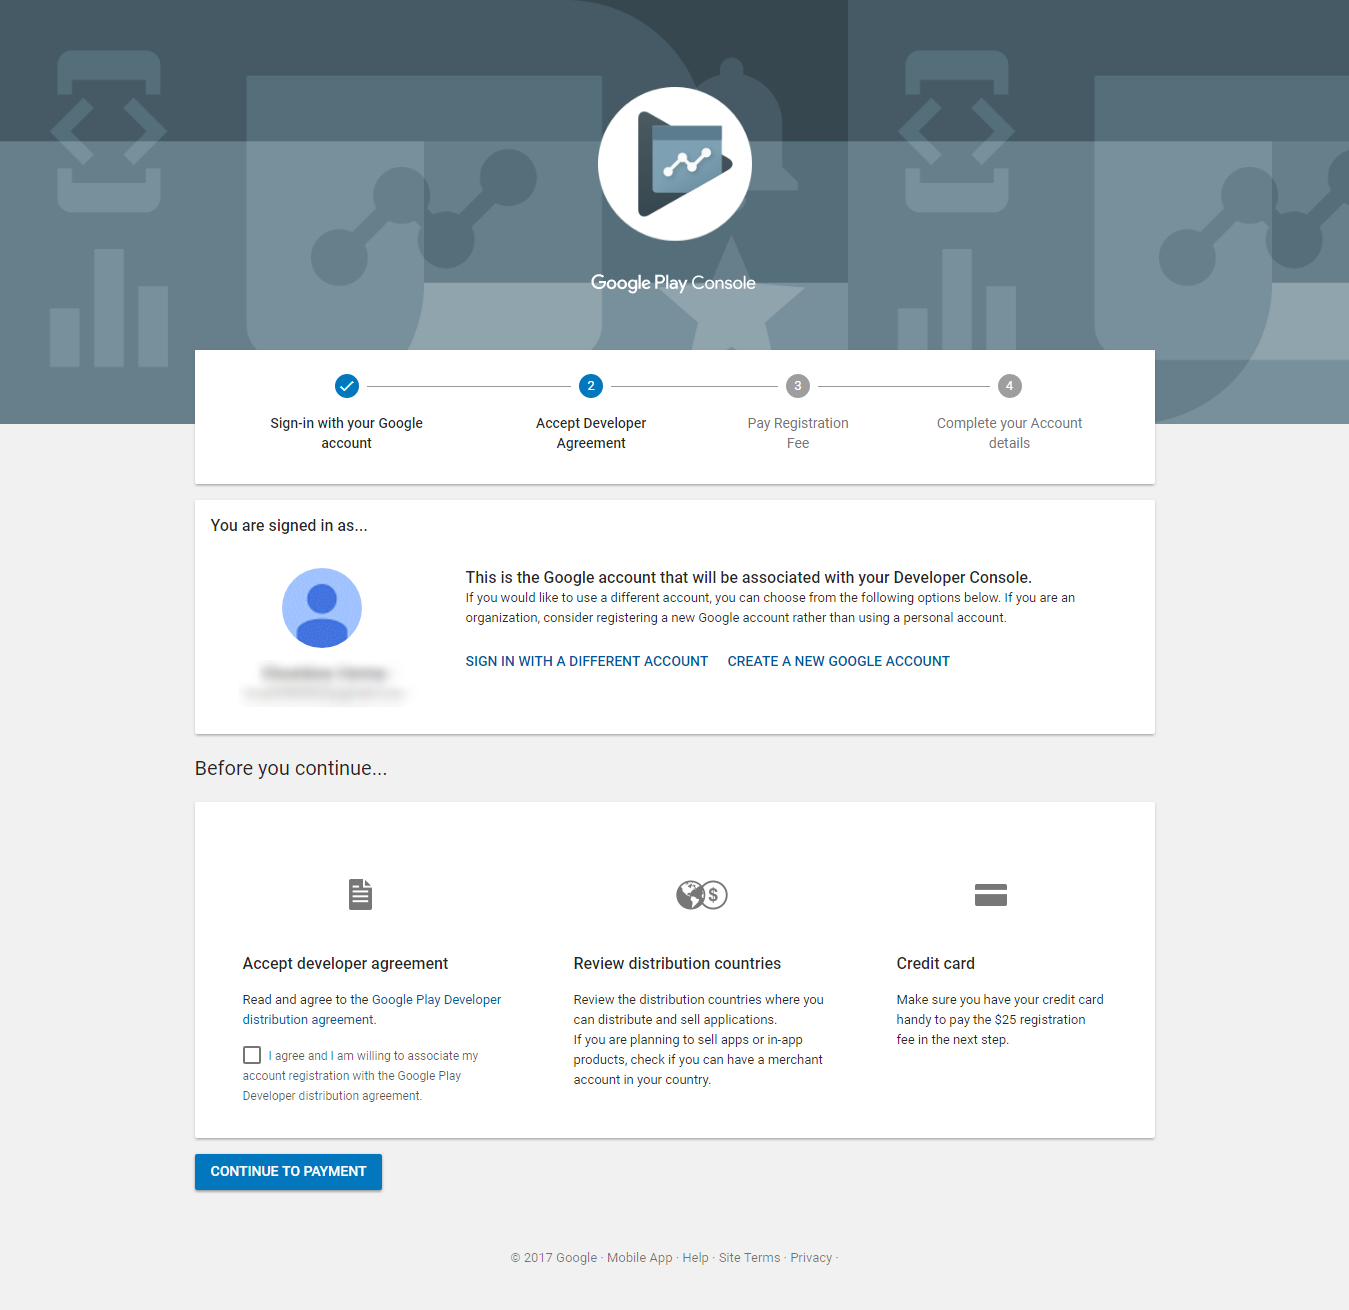
2. Review and accept Google’s terms
You’ll need to read and agree to Google’s Developer Terms of Service to continue. Google will ask for some details, including:
- Full name or company name
- Email address (you can use the same Gmail)
- Phone number (you’ll verify it via SMS)
- Website (optional but recommended)
3. Pay the one-time registration fee
Google charges a one-time $25 registration fee, payable by credit or debit card. Once paid, Google will review your account information. This process may take up to 48 hours. You’ll receive an email confirming whether your account has been approved or rejected.
If rejected, you can reapply after making the necessary adjustments.
Congratulations! Your Account Has Been Approved !
Congratulations! Your Google Play Developer account is now active. You can now publish your first app on the Play Store.
1. Start a new release
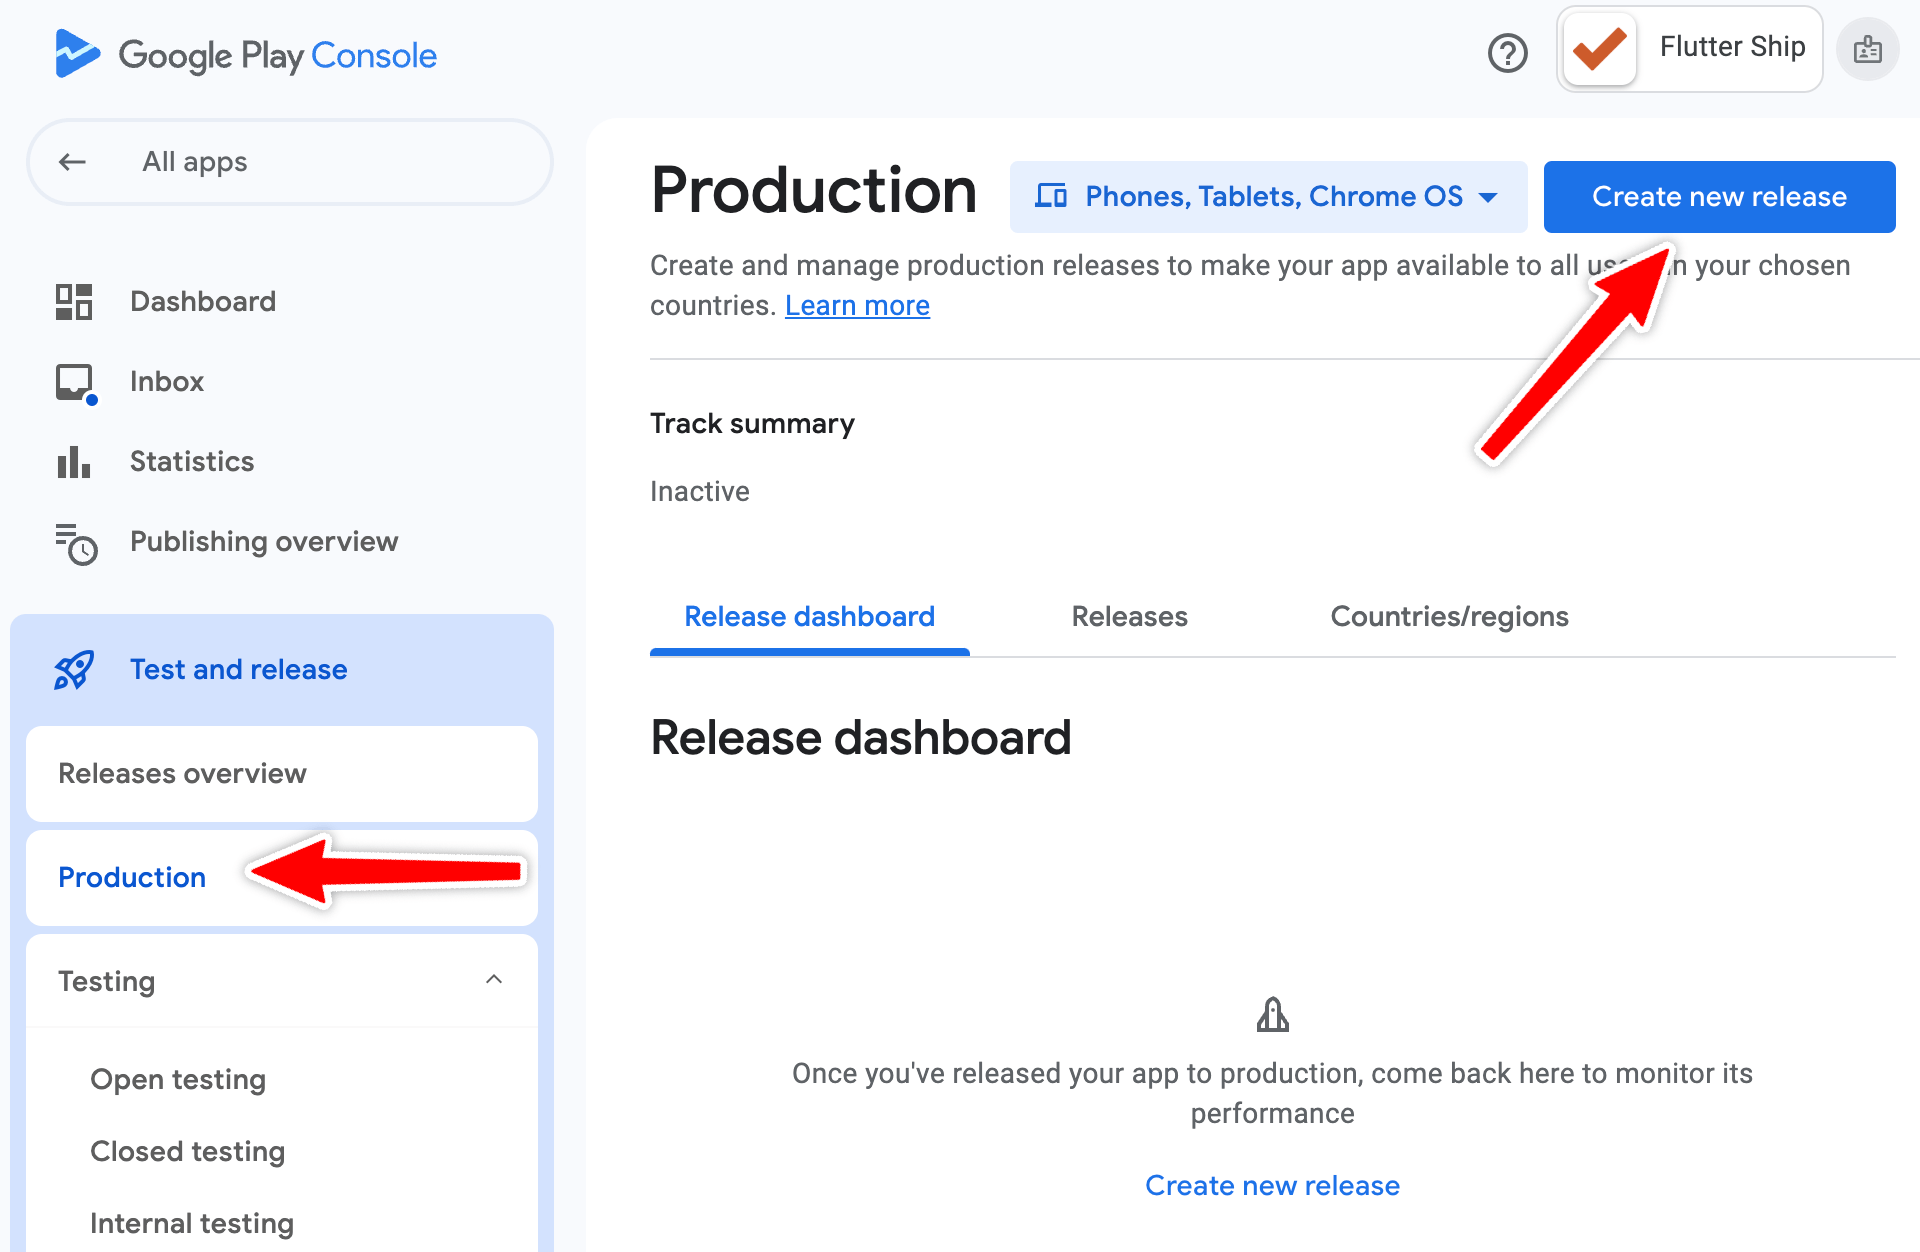
From your dashboard, click Create New Release to begin uploading your app. You’ll first need to specify some details:
- Default language
- App name
- Whether it’s free or paid
- Category, type, and purpose of your app
- Accept Google’s distribution policies to proceed
2. Add app information
On the next page, fill in your app details:
- Short description (brief summary shown in search results)
- Full description (detailed overview of your app)
- Screenshots from inside the app
- App icon (512×512 pixels)
- Optional media like a promo video
3. Configure privacy and distribution settings
You’ll also need to provide:
- A Privacy Policy URL (preferably hosted on your website)
- Content rating (target audience: children, teens, adults, etc.)
- App category (e.g., Lifestyle, Business, Tools, etc.)
- Pricing (if your app is paid)
- Target countries or regions
Uploading Your App
When everything is ready, upload your app build:
- Go to Production -> Releases -> Create New Release
- Upload your app file in AAB or APK format
- Add release notes describing what’s new in this version
Finally, review all the information you’ve entered and click Submit for review.
The Google Play team will check your app for compliance. If it’s rejected, you’ll receive a detailed email explaining why, allowing you to fix and resubmit it.
Conclusion
Once approved, your app will be published on the Google Play Store, and users can find it by searching its name.
From the Google Play Console dashboard, you can monitor key analytics such as downloads, search keywords, ratings, and more … helping you grow your app and audience over time.